

I have an Airport Extreme with a handy USB port and want to remotely access my hard drive that is plugged into it. It’s easy to access the Hard Drive locally, but remotely is a whole different ballgame.
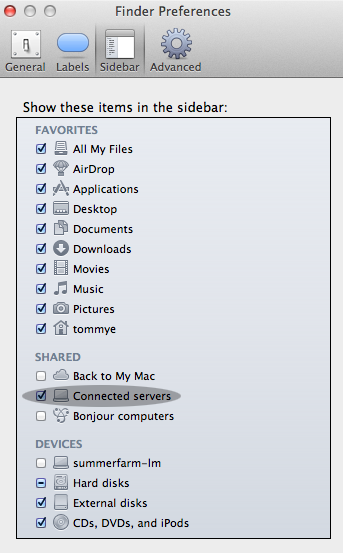
First, Plug in any hard drive into your Airport Extreme. It should now show up in your Finder. If it doesn’t, go to your Finder Preferences.
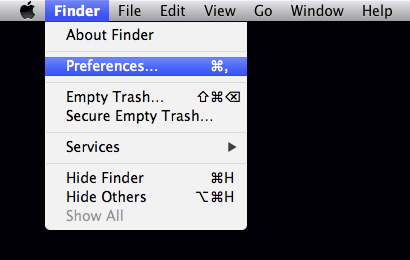
Make sure “Connected servers” is checked.
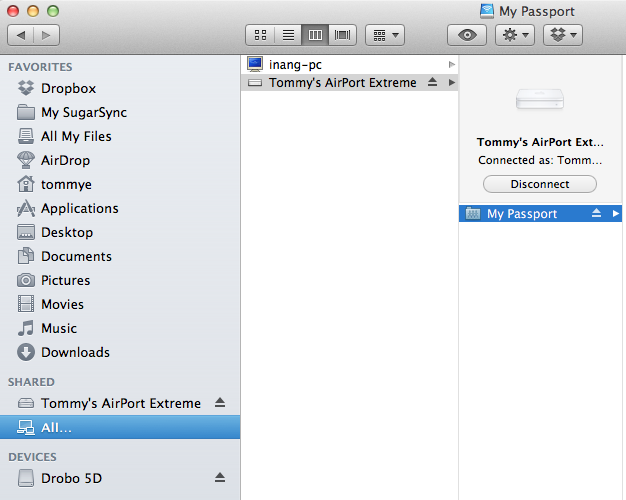
Your Hard Drive should now be mounted in Finder as a Share Point.
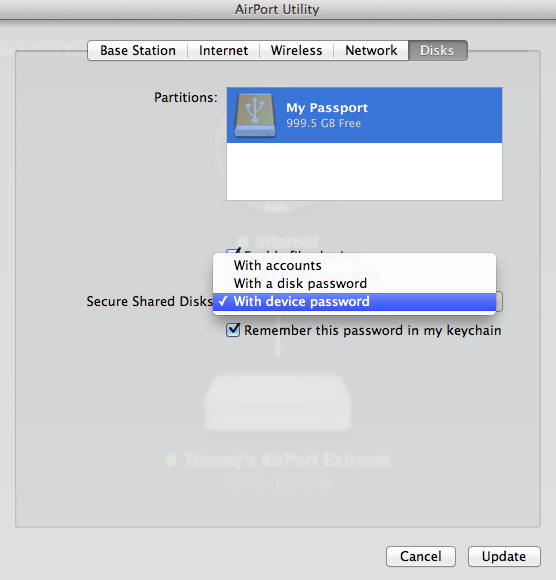
Launch your Airport Utility and click on the “Disks” tab. Check the “Share disks over WAN” box.
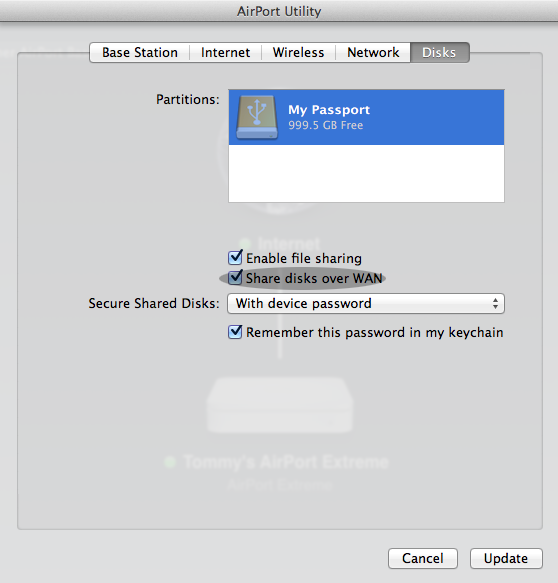
Choose your “Secure Shared Disks” option.
The AirPort Extreme Base Station allows you to select one of three options to secure your network drive.
- With accounts: This is a good option for networks that have lots of users who require different types of access. Every individual will have their own username and password. You can allow users to have “read only” or “read and write” access permissions to the network drive. Could be useful in a situation where an employee needs the ability to view files on the network drive, but should not be creating or modifying files.
- With a disk password: This option probably strikes the best balance between security and convenience. All users will share one password to access the network drive.
- With device password: To access the network drive, all users will enter the password you set for the AirPort Extreme Base Station. (That password is stored in AirPort Utility Application → AirPort → Base Station.) This option is not recommended for networks with multiple users, because anyone with the password could change your AirPort Extreme’s configuration.
Click the “Update” button (requires a router reboot that happens automatically.
Your drive is now remotely accessible.
But there’s a catch (of course there is). You need to know your IP address in order to connect to it remotely. Most people’s internet connection is dynamic (changes regularly), so you’ll need to go through a DNS service like DynDNS Pro, which will run you about $20 per year.
What is DynDNS Pro?
“Looking to access your computer, DVR, webcam or camera system remotely without having to remember a confusing (and ever changing) IP address? Try DynDNS Pro, a great option for those who need Dynamic DNS and Remote Access capabilities without any bells, whistles or fireworks.”
FYI – If you are running DynDNS Pro, you will have to have a computer that is always on in order for the program to automatically update your most current IP address to its server.
For now, we will connect via IP address.
Go to http://www.whatismyip.com. You should see your current IP address (XX.XX.XX.XX).
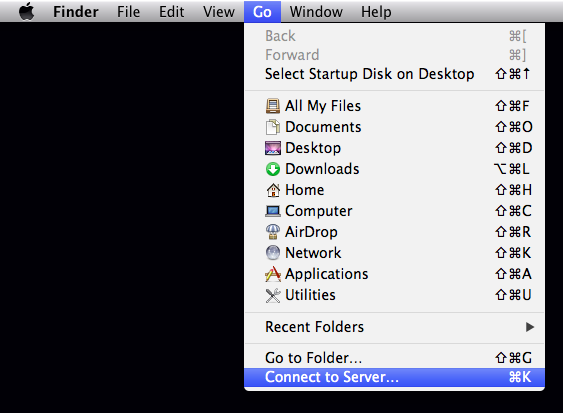
Then, within Finder, click “Go > Connect to Server…“.
Enter in afp://XX.XX.XX.XX and click Connect.
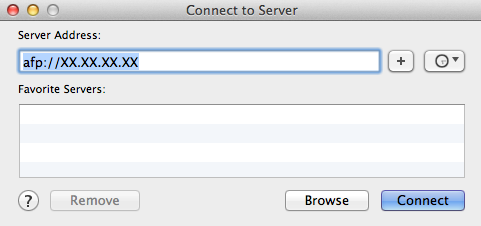
What is afp? Apple File Protocol
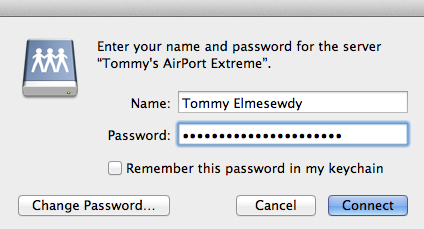
Enter in your user name and password. If you choose the “Secure Shared Disks” option “With device password“, the user name really doesn’t matter. It’s the router password that is important.
Your Hard Drive should now show up in Finder as a remote accessed Hard Drive.

I’m sorry I wasn’t able to show you how to setup DynDNS Pro, but currently I do not have nor need its services. I hope this at least leads you in the right direction, or gives you a better understanding of how to connect to your shared Hard Drive with your Airport Extreme remotely.