

This setup assumes that you are running a web server and mysql on the same server.
Step 1
cd into your root directory.
cd /your/root/directoryStep 2
Download and unzip.
wget https://wordpress.org/latest.tar.gz && tar -xzvf latest.tar.gz && rm -rf latest.tar.gz && cd wordpress && mv * .. && cd .. && rm -rf wordpressStep 3
Create database and user within mysql.
Note: Update database_name, username and password fields.
mysql -u root -p
mysql> CREATE DATABASE database_name;
mysql> CREATE USER 'username'@'localhost' IDENTIFIED BY 'password';
mysql> GRANT ALL PRIVILEGES ON databasename.* TO ''@'localhost';
Step 4
Complete WordPress install.
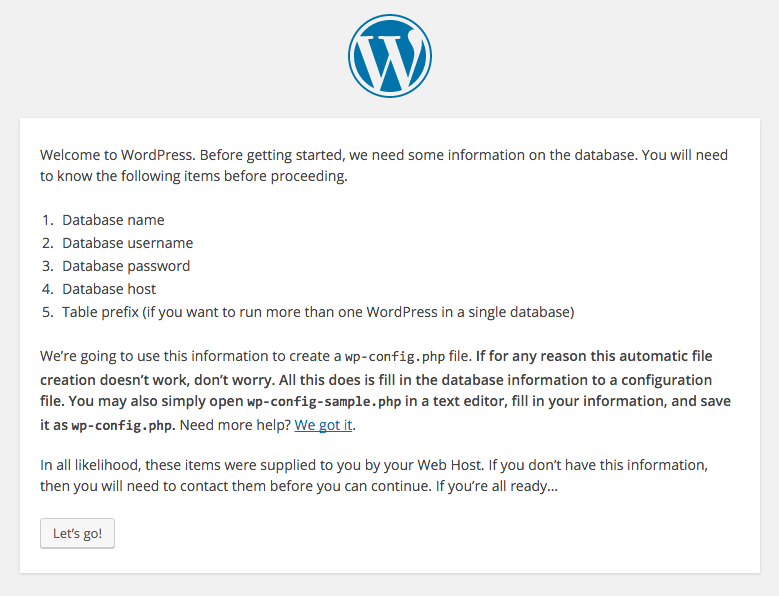
You should see the following screen (click Let’s go!).
Fill out Database Name, User Name and Password. Leave the rest as default.
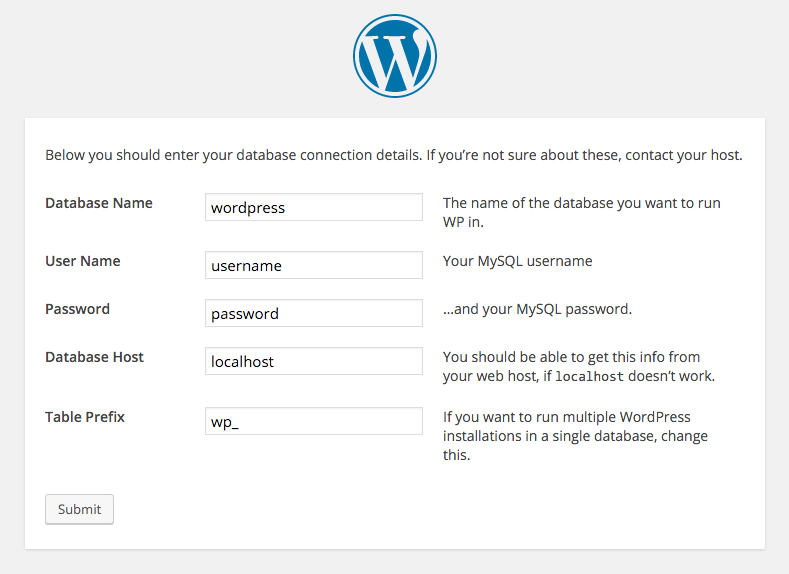
Once you’ve filled out your database information, it will prompt you to create a wp-config.php file within your root directory. Copy and paste the auto-generated code into wp-config.php and save it.
vi wp-config.phpStep 5
Setup Permalinks.
This is not really part of the install steps, but I’m adding it here because I think it’s pretty important and convenient to setup at this point of the installation.
Once logged in to WordPress, go to Settings > Permalinks.
Select Day and name.
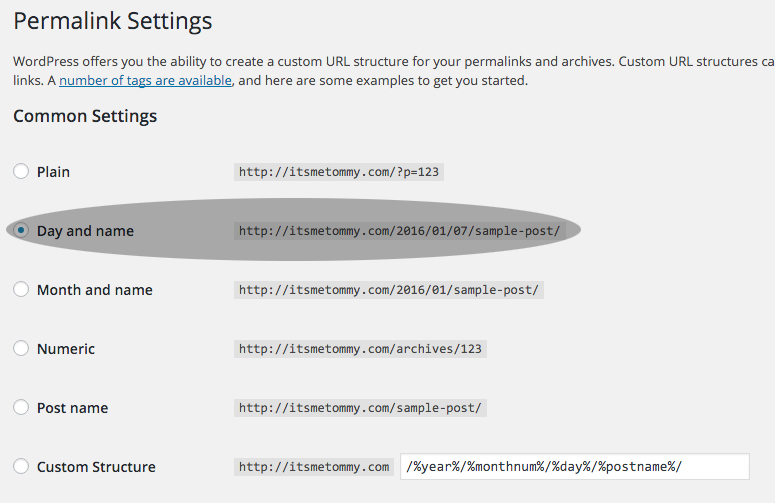
You will need to create an .htaccess file within your root directory and copy the code from the bottom of the page.
vi .htaccess
# BEGIN WordPress

RewriteEngine On
RewriteBase /
RewriteRule ^index\.php$ - [L]
RewriteCond %{REQUEST_FILENAME} !-f
RewriteCond %{REQUEST_FILENAME} !-d
RewriteRule . /index.php [L]

# END WordPress
That’s it!