

Heptio Ark is a utility for managing disaster recovery, specifically for your Kubernetes cluster resources and persistent volumes.
I will be showing you how to install Ark Client and Server on a Mac. Then I’ll show you how to install Ark on GCP and configure a backup and restore.
Install Ark Client
brew install arkInstall Ark Server
IMPORTANT: Make sure to check out the appropriate version. It is recommended that you check out the latest tagged version. The master branch is under active development and might not be stable.
You can view the latest version HERE.
git clone https://github.com/heptio/ark.git
cd ark
git tag -l               # view tags
git checkout tags/v0.9.9 # switch to tag
Run Ark on GCP
- https://heptio.github.io/ark/master/gcp-config.html
- https://github.com/heptio/ark/blob/master/docs/gcp-config.md
Create GCS bucket
BUCKET=[YOUR_BUCKET]

# example
BUCKET=k8s-devops-backup

gsutil mb gs://$BUCKET/
Create service account
View your current config settings
gcloud config listStore the project value from the results in the environment variable $PROJECT_ID
PROJECT_ID=$(gcloud config get-value project)Create service account
Note: If you’ll be using Ark to backup multiple clusters with multiple GCS buckets, it may be desirable to create a unique username per cluster rather than the default heptio-ark.
gcloud iam service-accounts create heptio-ark \
 --display-name "Heptio Ark service account"
List all accounts and find the heptio-ark account you just created
gcloud iam service-accounts list | grep heptio-ark

# example
gcloud iam service-accounts list | grep heptio-ark
Heptio Ark service account              heptio-ark@xxxxx.iam.gserviceaccount.com
Set the $SERVICE_ACCOUNT_EMAIL variable to match its email value
SERVICE_ACCOUNT_EMAIL=heptio-ark@xxxxx.iam.gserviceaccount.comAttach policies to give heptio-ark the necessary permissions to function
A
ROLE_PERMISSIONS=(
 compute.disks.get
 compute.disks.create
 compute.disks.createSnapshot
 compute.snapshots.get
 compute.snapshots.create
 compute.snapshots.useReadOnly
 compute.snapshots.delete
 compute.projects.get
)
B
gcloud iam roles create heptio_ark.server \
 --project $PROJECT_ID \
 --title "Heptio Ark Server" \
 --permissions "$(IFS=","; echo "${ROLE_PERMISSIONS[*]}")"

# example
gcloud iam roles create heptio_ark.server \
 --project $PROJECT_ID \
 --title "Heptio Ark Server" \
 --permissions "$(IFS=","; echo "${ROLE_PERMISSIONS[*]}")"
Created role [heptio_ark.server].
etag: xxxxx_xxxxx=
includedPermissions:
- compute.disks.create
- compute.disks.createSnapshot
- compute.disks.get
- compute.projects.get
- compute.snapshots.create
- compute.snapshots.delete
- compute.snapshots.get
- compute.snapshots.useReadOnly
name: projects/xxxxx/roles/heptio_ark.server
stage: ALPHA
title: Heptio Ark Server
C
gcloud projects add-iam-policy-binding $PROJECT_ID \
 --member serviceAccount:$SERVICE_ACCOUNT_EMAIL \
 --role projects/$PROJECT_ID/roles/heptio_ark.server
D
gsutil iam ch serviceAccount:$SERVICE_ACCOUNT_EMAIL:objectAdmin gs://${BUCKET}Create a service account key, specifying an output file (credentials-ark) in your local directory
Note: This will download the file credentials-ark to your localhost.
gcloud iam service-accounts keys create credentials-ark \
 --iam-account $SERVICE_ACCOUNT_EMAIL

# example
gcloud iam service-accounts keys create credentials-ark \
 --iam-account $SERVICE_ACCOUNT_EMAIL
created key [xxxxx] of type [json] as [credentials-ark] for [heptio-ark@xxxxx.iam.gserviceaccount.com]
Credentials and configuration
If you run Google Kubernetes Engine (GKE), make sure that your current IAM user is a cluster-admin. This role is required to create RBAC objects. See the GKE documentation for more information.
In the Ark root directory, run the following to first set up namespaces, RBAC, and other scaffolding. To run in a custom namespace, make sure that you have edited the YAML files to specify the namespace. See Run in custom namespace
Configure Ark
In the root directory of Ark, run:
kubectl apply -f examples/common/00-prereqs.yamlCreate a Secret
In the directory of the credentials file you just created, run:
Note: If you use a custom namespace, replace heptio-ark with the name of the custom namespace.
kubectl create secret generic cloud-credentials \
 --namespace heptio-ark \
 --from-file cloud=credentials-ark
Specify the following values in the example files
vi examples/gcp/00-ark-config.yaml
bucket: k8s-devops-backup # update this line
Start the server
Run apply
kubectl apply -f examples/gcp/View
kubectl -n heptio-ark get deployments -l component=arkErrors

kubectl logs deployment/ark -n heptio-ark
time="2018-10-24T21:29:25Z" level=info msg="setting log-level to INFO"
time="2018-10-24T21:29:25Z" level=info msg="Starting Ark server v0.9.9" logSource="pkg/cmd/server/server.go:101"
time="2018-10-24T21:29:25Z" level=info msg="Checking existence of namespace" logSource="pkg/cmd/server/server.go:264" namespace=heptio-ark
time="2018-10-24T21:29:25Z" level=info msg="Namespace exists" logSource="pkg/cmd/server/server.go:270" namespace=heptio-ark
time="2018-10-24T21:29:25Z" level=info msg="Checking existence of Ark custom resource definitions" logSource="pkg/cmd/server/server.go:299"
An error occurred: custom resource Config not found in Ark API group ark.heptio.com/v1
Fix
This was because I used the master branch, which is constantly worked on and updated. I learned that you should use the latest version tag.
Testing
Create example/nginx-app
kubectl apply -f examples/nginx-app/base.yamlGet deployment
kubectl -n nginx-example get deploymentsBackup
ark backup create nginx-backup --selector app=nginxConfirm backup
ark backup get
# example
ark backup get
NAME STATUS CREATED EXPIRES SELECTOR
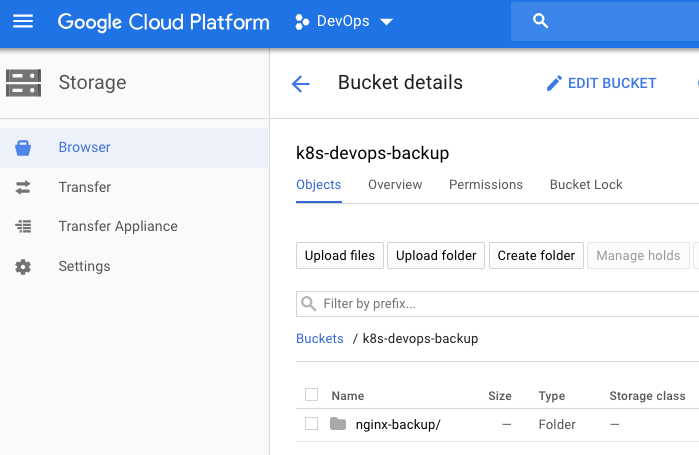
nginx-backup Completed 2018-10-24 16:28:17 -0700 PDT 29d app=nginxYou should now see the backup in GCP Storage.
Simulate disaster
kubectl delete namespace nginx-exampleConfirm disaster
You should see No resources found.
kubectl -n nginx-example get deploy
kubectl -n nginx-example get svc
kubectl get ns/nginx-example
Restore
ark restore create --from-backup nginx-backup

# example
ark restore create --from-backup nginx-backup
Restore request "nginx-backup-20181024163202" submitted successfully.
Run `ark restore describe nginx-backup-20181024163202` for more details.
Confirm restore
kubectl -n nginx-example get deploy
kubectl -n nginx-example get svc
kubectl get ns/nginx-example
Get restore
Note: The restore can take a few moments to finish. During this time, the STATUS column reads InProgress.
ark restore get

# example
ark restore get
NAME                          BACKUP         STATUS      WARNINGS   ERRORS    CREATED                         SELECTOR
nginx-backup-20181024163202   nginx-backup   Completed   0          0         2018-10-24 16:32:02 -0700 PDT   <none>
After a successful restore, the STATUS column is Completed, and WARNINGS and ERRORS are 0. All objects in the nginx-example namespace should be just as they were before you deleted them.
If there are errors or warnings, you can look at them in detail:
ark restore describe [RESTORE_NAME]

# example
ark restore describe nginx-backup-20181024163202
Name:         nginx-backup-20181024163202
Namespace:    heptio-ark
Labels:       <none>
Annotations:  <none>

Backup:  nginx-backup

Namespaces:
  Included:  *
  Excluded:  <none>

Resources:
  Included:        *
  Excluded:        nodes, events, events.events.k8s.io, backups.ark.heptio.com, restores.ark.heptio.com
  Cluster-scoped:  auto

Namespace mappings:  <none>

Label selector:  <none>

Restore PVs:  auto

Phase:  Completed

Validation errors:  <none>

Warnings:  <none>
Errors:    <none>
Clean up
If you want to delete any backups you created, including data in object storage and persistent volume snapshots, you can run:
ark backup delete [BACKUP_NAME]

# example
ark backup delete nginx-backup
This asks the Ark server to delete all backup data associated with BACKUP_NAME. You need to do this for each backup you want to permanently delete. A future version of Ark will allow you to delete multiple backups by name or label selector.
kubectl delete -f examples/nginx-app/base.yamlBackup
# backup everything
ark backup create devops-cluster-all

# backup everything, including snapshots
ark backup create devops-cluster-all-snap --snapshot-volumes

# backup by label
ark backup create label-app-hello --selector app=hello

# backup by label, including sanapshots
ark backup create label-app-hello-snap --selector app=hello --snapshot-volumes

# backup by namespace
ark backup create itsmetommy-ns --include-namespaces itsmetommy

# backup by namespace, including snapshots
ark backup create itsmetommy-ns-snap --include-namespaces itsmetommy --snapshot-volumes

ark backup delete [BACKUP_NAME]   # delete backup
ark backup describe [BACKUP_NAME] # describe the details of a backup
ark backup logs [BACKUP_NAME]     # fetch the logs for this specific backup
Restore
ark restore create --from-backup [BACKUP_NAME] # restore backup
ark restore get                                # view backups
ark restore get -o yaml                        # view backups w/ more detail
ark restore describe [RESTORE_NAME]            # describe the details of a restore
ark restore logs [RESTORE_NAME]                # fetch the logs for this specific restore
Schedule backups
The schedule operation allows you to back up your data at recurring intervals. The first backup is performed when the schedule is first created, and subsequent backups happen at the schedule’s specified interval. These intervals are specified by a Cron expression.
Scheduled backups are saved with the name <SCHEDULE NAME>-<TIMESTAMP>, where <TIMESTAMP> is formatted as YYYYMMDDhhmmss.
When you create a backup, you can specify a TTL by adding the flag –ttl <DURATION> (default 720h0m0s/30 days). If Ark sees that an existing backup resource is expired, it removes:
- The backup resource
- The backup file from cloud object storage
- All PersistentVolume snapshots
- All associated Restores
Schedule backup
ark schedule --help
ark schedule get # view scheduled backups

# daily at 07:00
ark schedule create [SCHEDULE_NAME] --schedule "0 7 * * *"

# daily at 01:00:00
ark schedule create itsmetommy-schedule --schedule="0 1 * * *" --include-namespaces itsmetommy --snapshot-volumes

# daily at 01:00:00
ark schedule create nginx-daily --schedule="0 1 * * *" --selector app=nginx

# daily at 00:00:00
ark schedule create nginx-daily --schedule="@daily" --selector app=nginx
Restore schedule backup
ark restore --help
ark restore create --from-backup [SCHEDULE NAME]-[TIMESTAMP] # restore scheduled backup
Helpful tips
- When using a label selector, make sure persistent volumes have the same label
- When testing, make sure resources are fully deleted before restoring
One response to “Kubernetes: Cluster Backup with Heptio Ark on GCP”
[…] Ark is now Velero! As I’ve already written HERE, I thought I’d give an update to the slightly different installation of Heptio […]